After a massive absence from the Blog entirely caused by real life, work and all those other things we hate, I am returning with a quick tutorial on how to sculpt mushrooms. One of the facebook groups I am a member of had a fellow hobbyist who found the need to sculpt some giant mushrooms for his night goblin army, but lacked the knowledge on how to go about such a feat, so he asked the community how and I offered this solution.

Firstly let me introduce the tools I will be using during this tutorial

The tool on the far right is a detail needle and is very useful for small holes and engraving detail in to the clay (if you don't have one don't panic you can simply use a scalpel blade or a large pin), next to this is perhaps my most versatile tool which features a medium fine point at one end and a large rounded bottom (as well as looking rather like an escapee wand from Harry Potter), and the final tool I will point out is the very large very sharp razor blade on the left side of the tray which you will see used for cutting the clay, worth buying if you intend on working with clay a lot but easily replaceable with a scalpel if you are not.
Step 1
Select your polymer clay of choice, I tend to use Sculpy as you can add a plasticiser to that brand if you need to, select a red, white and yellow.
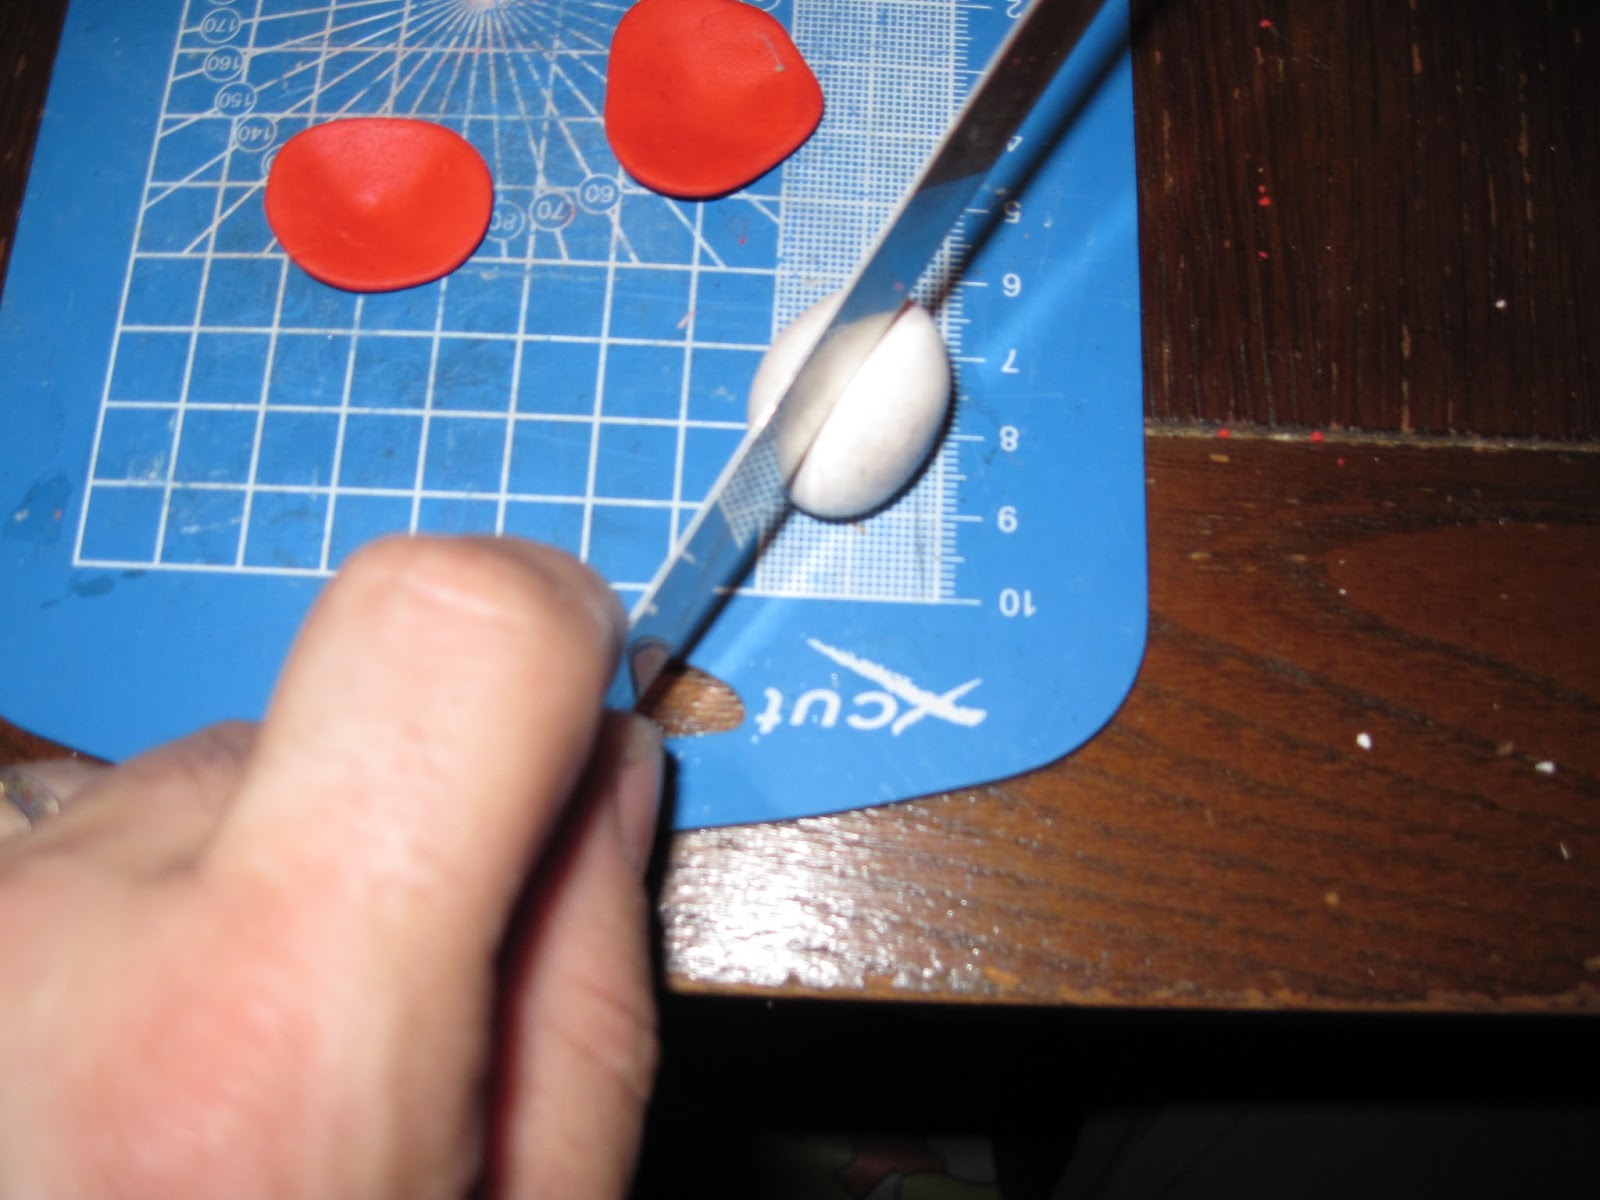
Step 2

Roll a Small ball of red clay continue to work the clay until nice and warm and responds well to your manipulation at this point slice the red clay ball in half

using your fingers or modelling tools flatten these semi spheres out into shallow dish shapes (see photo below)


Step 3
Take your white clay and a small amount of yellow clay to and mix to make a slightly off white colour (or just buy a colour matching off white) once mixed cut the ball in half, put one half to the side for the moment you will need it later on.
Cut the remaining half in half again and place one of these quarters in each shallow red 'bowl', proceed to press the white clay in to fill the whole dish.


Step 4
Mark the center point of your mushroom and using a sculpting tool draw lines in the white from the outer edge in towards the center point continue to do this till the whole underside of the mushroom is done


Step 5
Indent the center point of the white, this is to allow the stalk to sit into the mushroom head better.

Step 6
Take the off white clay you put to on side earlier and roll out a small 'sausage' then chop this down to create the stalks.

Push the stalks in to the indent you made in the center of the mushroom heads and press gently on the end on the stalk which will cause it so shorten and swell slightly and creating a firm bond with the head on the mushroom.

Step 7
Bake the polymer clay as per the instructions for your specific brand (the key here tends to be low temperature and slow baking prevents the clay burning this is really important if you have done any additional fine details)

Step 8
Remove from oven, then allow to cool

Step 9
Paint any additional detail you wish, often white or yellow spots are added to the top surface.
Step 10
Relax with the sure knowledge you are more than most mere mortals for you are 'Mushroom Man' or you could just base them and game with them.
Of course you can make these mushrooms as big or a small as you want, you may also wish to consider a little variety by sculpting a conical shape instead of a shallow bowl in step 2, the world is your oyster (or in this case mushroom)


No comments:
Post a Comment